3 Steps to Upload a File on the Files Page on Shopify
Shopify provides you a lot of function including the files uploading function. If you want to upload a picture to your store, or a file so as to advertise your products more effectively, and to make it easier for your customers to reach your products and their information, the files uploading feature will surely help you a lot.
Below are some steps for you to How to upload a file on the Files page on Desktop, iPhone, and Android
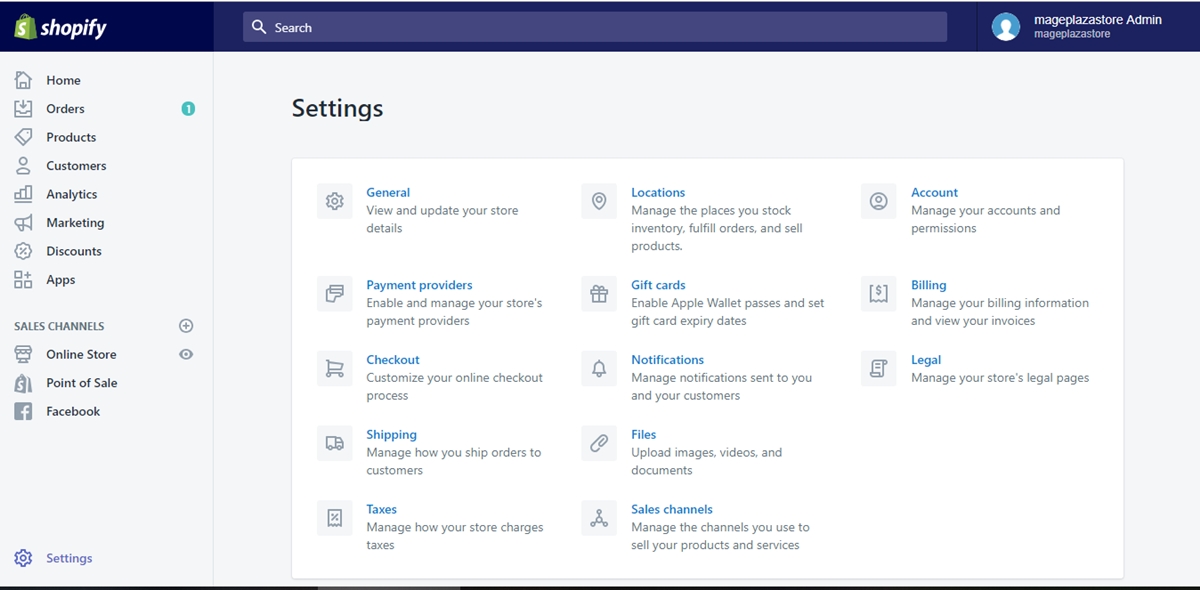
Step 1: Go to Files
Log into your Shopify admin’s account. Find and click to choose the Settings option on the bottom left of your page. When directed to the Settings page, click to go to Files.

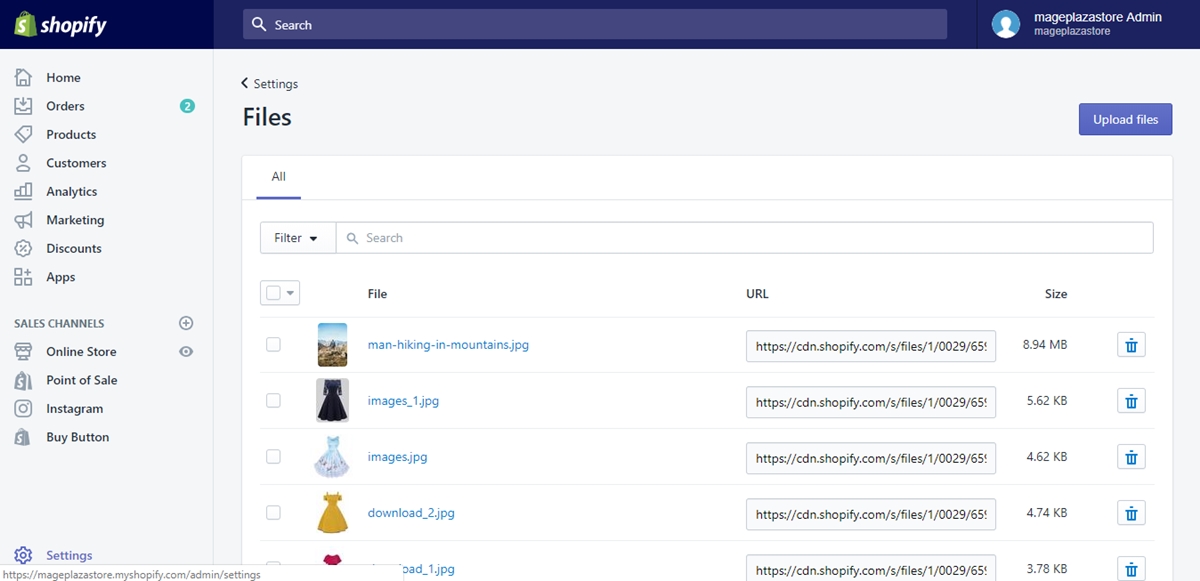
Step 2: Click on Upload Files
In the Files page, click on the Upload Files button on your right to upload your files.

Step 3: Choose Files
Choose the files from your device to upload and click Open when you finish.
Conclusion
On today’s tutorial, I introduced you How to upload a file on the Files page on Shopify. Just by following these above simple and easy steps, you can easily upload your wanted files to make your store looks more appearing. I hope you will find this tutorial helpful and will use the feature effectively.
About Us

AVADA Commerce Pte. Ltd. is an e-commerce solution provider headquater based in Singapore, Sales and development team in the USA and Vietnam where the best developers unite. Founded in 2014, AVADA is responsible to complete the mission to help 1 million online businesses grow revenues.
🏠 Address:
SIN: 1 Sophia rd, Peace Centre, Singapore, 228149
USA: 651 N Broad St, Suite 206, Middletown, DE 19709
VIE: 125 Tran Phu, Ha Dong, Ha Noi
📱Phone: (+84)24 6687 1163
📩 Email: anhnt@mageplaza.com
🌐 Website: https://avada.io/
#avada #shopify #emailmarketing #affiliate